
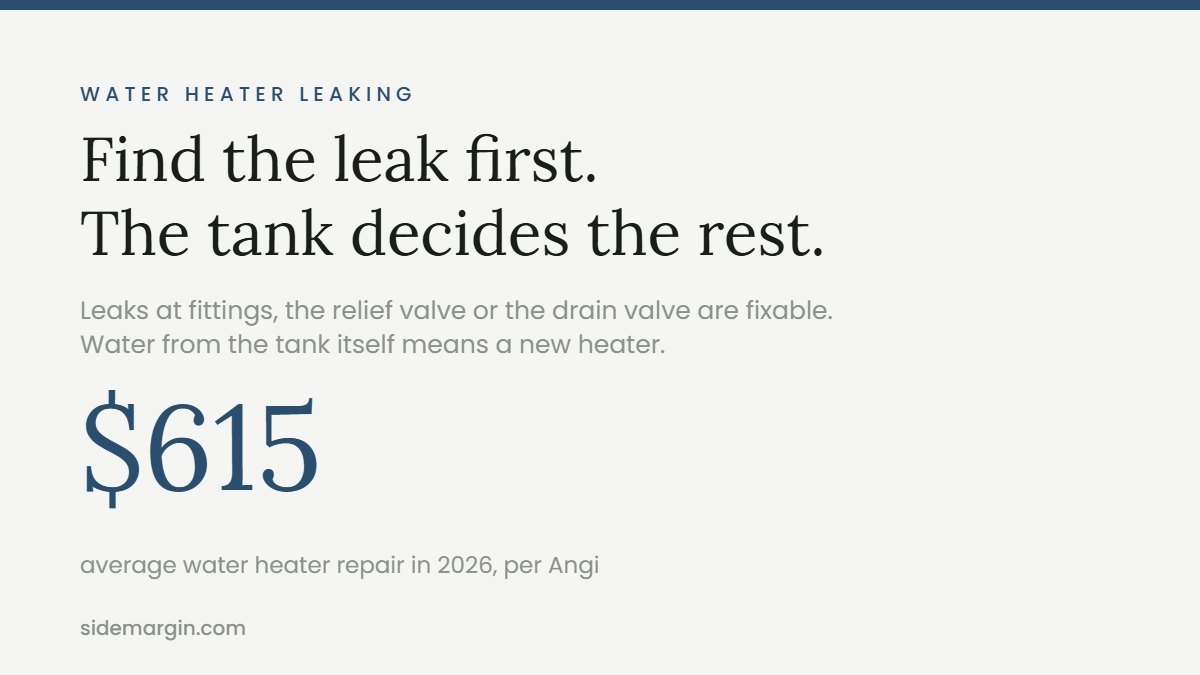
If your water heater is leaking, turn off its power or gas, close the cold water valve on top, and then find where the water is coming from. Leaks from the pipes, the relief valve or the drain valve are usually cheap fixes. Water coming out of the tank itself, usually seen at the bottom, means the heater has to be replaced, because a rusted tank cannot be repaired.
Below: the safe shutoff for gas and electric tanks, how to tell a leak from condensation, what each leak location means, what repairs cost, and what warranty and insurance usually pay. Where the answer depends on your unit or policy, I say so.
Key takeaways
- Shut it down first. Breaker off for electric, gas control off for gas, then close the cold water supply valve. Do not turn an electric heater back on until the tank is full again.
- Location tells you most of the story. Top leaks are usually fittings. Side leaks are often the temperature and pressure (T&P) relief valve. Bottom leaks can be the drain valve, condensation, or the tank.
- A leaking tank cannot be fixed. A.O. Smith says a seep where the relief valve joins the tank means “the heater should be replaced”, and its manuals say every tank “will eventually leak”.
- A dripping relief valve is a symptom, not the problem. The usual cause is high pressure from thermal expansion. Never cap or plug that valve.
- Repairs are usually hundreds, replacement is usually over $1,000. Angi puts the average water heater repair at $615 and a new installed heater at $880 to $1,800 in 2026.
- Insurance usually pays for the floor, not the heater. Sudden water damage is typically covered. The appliance that failed and slow leaks you ignored usually are not.
What to do in the first ten minutes when your water heater is leaking
If you smell gas, stop. The standard manufacturer instruction is: “Do not try to light any appliance. Do not touch any electrical switch; do not use any phone in your building. Immediately call your gas supplier from a neighbor’s phone.” If water has reached an outlet or the heater’s electrical box, do not wade in. Cut power at the main panel from a dry spot, or call an electrician. Otherwise, work through these steps.
| Step | Electric tank | Gas tank |
|---|---|---|
| 1. Stop the heat | Switch off the water heater’s breaker at the panel | Turn the gas control knob to OFF and close the manual gas shutoff valve on the supply line |
| 2. Stop the water | Close the cold water shutoff valve on the pipe feeding the heater | Same |
| 3. Protect the room | Move boxes, rugs and electronics. Put down towels or use a wet vac | Same, and keep the burner area clear |
| 4. Decide whether to drain | Drain only if water is still coming from the tank itself | Same |
| 5. Document | Take photos of the heater, the rating plate and the damage | Same |
The order matters for electric units. A.O. Smith’s manual warns: “Applying electrical power to elements not submerged in water will destroy them. The manufacturer will not warranty any elements damaged in this manner.” The breaker stays off until the tank is refilled and a hot faucet runs without sputtering. Power vent gas heaters also plug in for the fan, so unplug those too.
When to drain the tank
Closing the cold supply stops new water, but the tank can keep leaking what is inside. If water is coming from the tank body, drain it. For a loose fitting or dripping relief valve, closing the supply is usually enough.
The manufacturer’s procedure: disconnect power (or gas), open a nearby hot faucet until the water is no longer hot, close the cold inlet valve, run a hose from the drain valve to a drain or outdoors, then open the drain valve. The Consumer Product Safety Commission notes that a six second exposure to 140 degree water can cause a serious burn.
Is it really leaking, or is it condensation?
Some water under a heater is normal. Cold water in a warm, humid room makes the tank sweat, and on gas units moisture can drip from the flue onto the burner. A.O. Smith’s technical bulletin on puddles says condensation “should only be noticeable after a long draw of hot water” and that “once the temperature of the tank is above 110°F, condensation should stop.”
The test: dry everything, then look again after the heater has finished heating and nobody has used hot water for a few hours. Dry floor means condensation. A puddle with the tank hot means a leak. Also rule out a nearby softener, a furnace or AC condensate line, or a pipe dripping from above.
Water heater leaking from the top
Water on top usually comes from the threaded connections where the cold inlet and hot outlet pipes join the tank. A.O. Smith lists “leaking piping at inlet/outlet connections” among the common puddle sources, and its general leak guide says loose connections at the top “can be tightened.” A drip at a flexible connector is often a wrench or a new connector. Green or white crust means it has been weeping a while. Water running down from the top can pool at the bottom and look like a tank failure, so check the top first. Corroded fittings and anything on the gas line are plumber jobs.
Water heater leaking from the relief valve
The T&P relief valve is the brass safety valve with a small lever and a pipe running toward the floor. InterNACHI’s inspector training material explains it will “open and release water out of the tank if the temperature exceeds 210˚F”, and it also opens on excess pressure. Water heater tanks are limited to a maximum working pressure of 150 psi, according to A.O. Smith’s expansion tank manual.
A.O. Smith’s bulletin splits the symptom into three cases.
- Slow weeping or dribbling. The bulletin says the valve “relieves water slowly when actuating on pressure. A closed system can cause pressure to increase in the system.” Usually thermal expansion or high street pressure (next section).
- Occasional large gushes of hot water. The valve “relieves water quickly when actuating on temperature. The only cause of this problem is a malfunctioning thermostat.” Turn the heater off and call a pro.
- Water seeping where the valve screws into the tank. If it is the threads, the valve can be removed and resealed. If it is the welded fitting on the tank itself, A.O. Smith says: “Spuds are welded to the tank and are not repairable. The heater should be replaced.”
Never cap or plug the valve or its discharge pipe: “Do not plug the Temperature-Pressure Relief Valve opening. This can cause property damage, serious injury or death.” A worn valve is cheap to replace: Angi puts it at up to $200. Match the rating on your heater, because A.O. Smith warns an incorrectly sized valve voids the warranty.
Thermal expansion tanks and what code requires
Heated water expands and does not compress. In a closed system, where a check valve or backflow preventer at the meter, a pressure reducing valve or a softener stops water flowing backward to the main, pressure builds every time the heater runs.
A.O. Smith lists the symptoms: a relief valve that drips during heating, creaking pipes, and water that surges when a tap opens. Its warning, in capitals: “DO NOT DEPEND ON THE T&P VALVE TO HANDLE THERMAL EXPANSION!”
The fix is a thermal expansion tank, a small tank with an air bladder on the cold line. The International Plumbing Code, as published by the North Carolina Office of State Fire Marshal, requires one here: “Where a storage water heater is supplied with cold water that passes through a check valve, pressure reducing valve or backflow preventer, a thermal expansion tank shall be connected to the water heater cold water supply pipe.” Local amendments vary, so your plumbing inspector has the final word. From the expansion tank manual:
- If your incoming water pressure is over 80 psi, a pressure reducing valve is required. Recommended inlet pressure is 60 psi or less.
- The tank’s air charge must be adjusted to match your incoming water pressure. It ships at 38 psi, which may not match your house.
- Expansion tanks wear out too. The manual says it “will eventually leak.”
A pressure gauge on a hose bib or the heater drain shows your house pressure. Above 80 psi, or climbing while the heater runs and no water is used, explains the drip. Angi puts expansion tank replacement at $100 to $400 for parts and labor.
Water heater leaking from the bottom
Water at the base has four common causes. Only one is fatal to the heater.
The drain valve. The valve at the bottom front can drip if it was not fully closed or sediment keeps it from seating. Close it firmly; a hose cap on the spout stops a drip short term. A.O. Smith says to replace it if leakage continues, a routine repair.
Water coming from above. Top fittings or the relief valve pipe, which is supposed to end near the floor, can put water at the base.
Condensation or burner area components. A.O. Smith lists gas valve threaded connections (gas) and element gaskets (electric, water around the side access panels) as leak sources. These are repairs, not replacements, and pro jobs on gas units.
The tank itself. If none of those explain it, the tank has likely corroded through. Rheem says: “Pooling water around the tank body itself is a serious concern. It often indicates internal corrosion that has eaten through the metal.” A.O. Smith’s leak guide calls a corroded tank a case where “the most practical solution is often to replace the entire water heater.” Angi’s cost guide is plainer: “Internal corrosion or damage of that kind can’t be repaired.”
Usually this is not a defect. It is how tanks end. A.O. Smith’s manual says that “due to the normal corrosive action of the water, the tank will eventually leak after an extended period of time.” The anode rod slows corrosion, so A.O. Smith says to check it yearly and replace it once 6 inches of core wire shows. Once the tank leaks, a new anode will not save it.
Rust streaks, rusty hot water and a heater 10 or more years old all point to the tank. If that is you, our guide on when to replace a water heater covers choosing the replacement.
Quick diagnosis table: where, why and who fixes it
| Where it leaks | Likely cause | Usual fix | DIY or pro |
|---|---|---|---|
| Top, at pipe connections | Loose or worn fitting or flexible connector | Tighten or replace connector | DIY on water lines if comfortable; pro if corroded |
| Relief valve, slow drip | High pressure or thermal expansion | Pressure reducing valve, expansion tank, or new valve | Pro for valves and tanks |
| Relief valve, hot gushes | Thermostat malfunction, overheating | Turn off; thermostat or control repair | Pro, now |
| Relief valve fitting on the tank | Threads (reseal) or welded spud (not repairable) | Reseal, or replace heater | Pro |
| Bottom front spout | Drain valve not closed or failing | Close it; replace valve | DIY possible |
| Side access panels (electric) | Element gasket | Replace gasket or element | Pro recommended |
| Burner area (gas) | Condensation, or gas valve connection | Watch after heating; pro for gas valve | Pro for gas parts |
| Under the tank, from the tank body | Corroded tank | Replace the water heater | Pro |
Tankless water heater leaking
Tankless units have no tank to rust through. Check the water connections underneath, the relief valve if fitted, and on condensing models, the condensate line.
Condensing tankless heaters make water on purpose. Noritz explains that the second heat exchanger cools the exhaust enough that it “forms condensate inside the unit”, up to “a maximum of two gallons of liquid per hour.” It is acidic (Noritz says pH “two or three”) and should drain, usually via a neutralizer, to a floor drain or outside. A puddle is often a clogged, disconnected or frozen condensate line, not a failed heat exchanger. For units in cold spaces, our guide on how to prevent frozen pipes covers that side.
Water from inside the cabinet is a service call. Rheem recommends tankless maintenance, including cleaning the inlet filter, at least once a year.
What a leaking water heater costs to fix or replace
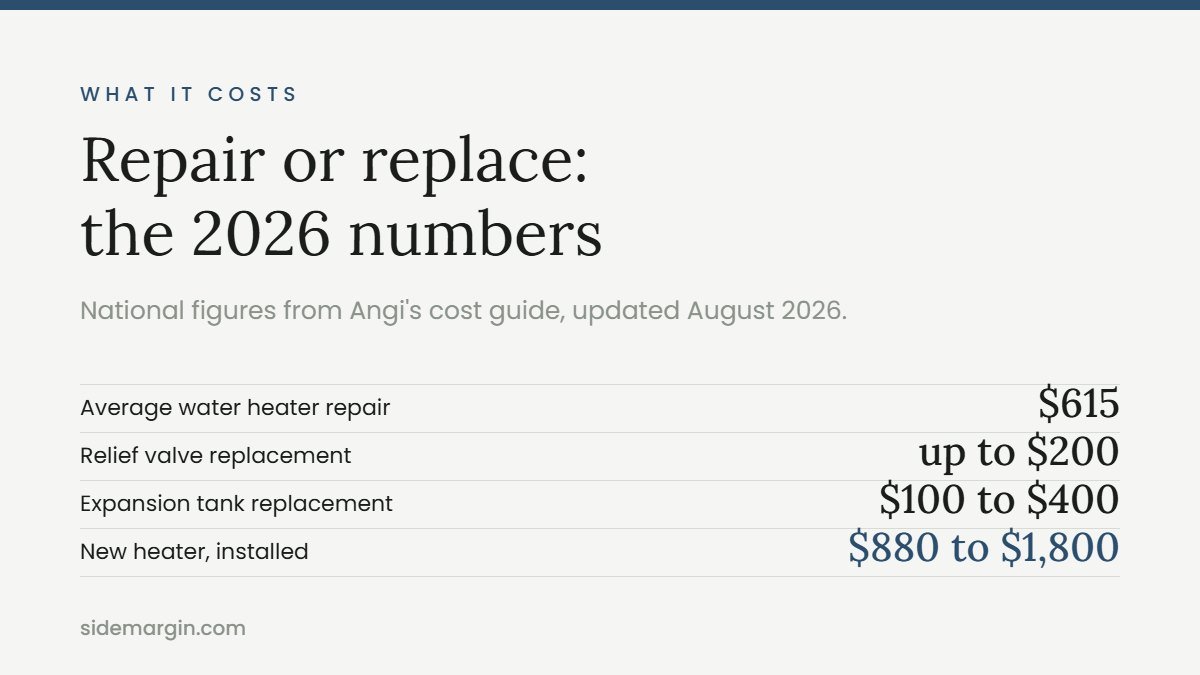
National figures from Angi’s cost guide, updated August 2026. Local labor rates and emergency calls move them.
| Job | Typical cost (Angi, 2026) |
|---|---|
| Average water heater repair | $615 (most pay $228 to $1,017) |
| Pressure relief valve replacement | Up to $200 |
| Expansion tank replacement | $100 to $400 |
| Heating element replacement | $200 to $300 |
| Electric thermostat replacement | $150 to $200 |
| Gas valve replacement | About $350 |
| Anode rod (part only) | $25 to $75 |
| New water heater, installed | $880 to $1,800 |
| Plumber labor | $50 to $150 per hour |
My read: a fitting, drain valve or relief valve on a heater under about 10 years old is an obvious repair. A leaking tank has no repair price to compare. An old heater needing a several hundred dollar repair is money better spent on replacement. Rheem says most conventional tank heaters last around 10 years; A.O. Smith gives a range of 8 to 20 years depending on the type.
Compare quotes on haul away, permits and code updates such as an expansion tank or drain pan. With a gas unit, check your carbon monoxide alarms too; our guide to carbon monoxide detector placement covers where.
Check the warranty before you pay
Check the age first. The rating plate lists the serial number, which encodes the manufacture date (formats vary by brand), and A.O. Smith lets you check warranty status online by serial number. Coverage is narrower than people expect. Rheem’s US residential policy summary:
- Tank warranties range from 6 years to as long as the original purchaser owns the home, depending on the model.
- Parts warranties range from 1 to 10 years.
- Labor is covered only in the first year. Rheem says it “will provide no warranty labor allowance for the replacement of any Rheem or Ruud Residential water heater that has been in operation for more than one (1) year.”
- Coverage starts at installation. Without proof, Rheem uses the date of manufacture plus 90 days.
- Permits, removal, disposal and “damage from water leakage” are excluded.
So a four year old heater with a six year tank warranty usually gets a free tank, and you pay the plumber to swap it.
Will homeowners insurance pay?
For the damage, often yes. For the heater, usually no. For a slow leak, usually no.
The Insurance Information Institute lists “accidental discharge or overflow of water or steam from within a plumbing, heating, air conditioning, or automatic fire-protective sprinkler system, or from a household appliance” among the perils a standard HO-3 policy covers. It also notes that “standard homeowners policies do not cover flooding, earthquakes or poor maintenance.”
The Texas Department of Insurance puts the line where most policies draw it: coverage is for “sudden and accidental” water damage, and “it’s not a leak that’s been dripping for a long time.” Nationwide says a policy does not cover “repair or replacement of the actual source of the water damage”, so a burst tank may get your flooring and drywall paid for, minus your deductible, but not the heater.
If you plan to claim:
- Stop the damage first. Texas says to “make enough repairs to keep the damage from getting worse.”
- Photograph everything, including the heater’s rating plate.
- Do not make permanent repairs until the adjuster has seen it.
- Call promptly. Your policy wording decides it, and mold coverage is often limited. If the damage is barely over your deductible, a claim may not be worth it.
What to do next
- If the water is from the tank body, keep the heater off, drain it, and get two replacement quotes. Ask what each price includes.
- If it is the relief valve, test your house pressure before replacing anything. Over 80 psi needs a pressure reducing valve; a closed system needs an expansion tank.
- If it is a fitting or the drain valve, fix it, then dry everything and check again after a full heating cycle.
- Check the serial number for warranty before paying for a new tank.
- If there is real water damage, call your insurer the same day and keep your photos.
- Afterward, put a leak alarm beside the heater and set a yearly reminder to test the relief valve and check the anode.
Sources
- A.O. Smith, Why is my water heater leaking?
- A.O. Smith, Technical Bulletin 51: puddle on the floor
- A.O. Smith, Technical Bulletin 52: leaking temperature and pressure relief valve
- A.O. Smith, Technical Bulletin 45: thermal expansion
- A.O. Smith, Water heater maintenance checklist
- A.O. Smith, Warranty verification
- A.O. Smith, Residential electric water heater installation instructions and use and care guide
- State Water Heaters, Instruction manual for residential power vent gas water heaters
- A.O. Smith, Water heater thermal expansion tank owner’s manual
- InterNACHI, Inspecting water heater tanks in residential dwelling units
- North Carolina Office of State Fire Marshal, Plumbing code 607.3 thermal expansion control
- Rheem, 5 signs your water heater is going bad
- Rheem, How to keep your tank and tankless water heaters running at peak performance
- Rheem, Summary of Rheem and Ruud US residential water heater warranty policy
- Noritz, Demystifying tankless water heater condensation
- Angi, How much does water heater repair cost? (updated August 2026)
- Consumer Product Safety Commission, Avoiding tap water scalds
- Insurance Information Institute, Homeowners insurance basics
- Texas Department of Insurance, Water damage
- Nationwide, Does homeowners insurance cover water damage?